Do you want to give view (read only) access to all colleagues for your ERP system without needing to buy additional licenses?
When an organisation has both a Dynamics 365 Business Central and Microsoft 365 subscription, administrators can configure environments to enable access with Microsoft 365 licences, and choose exactly which tables and other objects this category of user will have access to.
When configured, employees that have a Microsoft 365 licence but no Business Central licence can view Business Central records that are shared with them in Microsoft Teams chat and channels.
You can read the full Learn article here Business Central Access with Microsoft 365 licences - Business Central | Microsoft Learn
In this post I'll run through the config needed to setup this M365 access to D365BC.
Firstly you might be wondering what is considered an M365 license for the purposes of this Teams access to D365BC, here is the list:
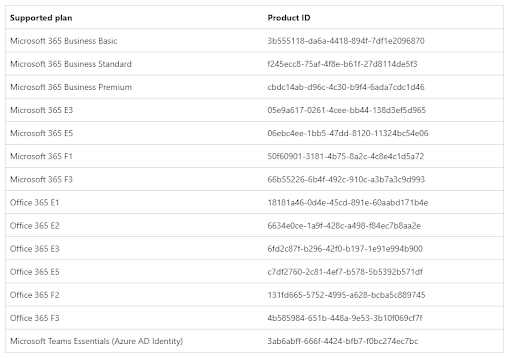 |
| Any of these Microsoft 365 will work for the BC access in Teams |
The feature is managed on the BC admin portal where there is an on/off control:
 |
| D365BC Admin portal, showing the M365 access feature control |
Best to prepare a few things before you turn it on. I will create an Entra Group (aka Azure Security Group) that will manage the permissions granted to the M365 users. In this simple example I want to simply grant read access to anything mu BC users share to teams and I created a group named "BC Read All"
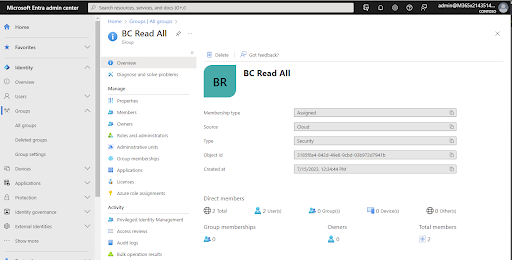 |
| Microsoft Entra admin center showing the "BC Read All" group |
Next I'll set the permissions for this security group in BC and clear out the License Configuration for M365 Licensed users - to ensure all control is managed by the Security Group (see here for more on that approach Simplify your user onboarding process with Dynamics 365 Business Central & Azure Security Groups)
 |
| Permissions config on the Security Groups page for "BC Read All" |
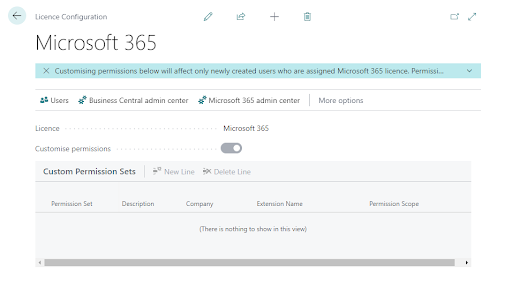 |
| Cleared out License config for Microsoft 365, this ensures all permissions are managed by the above Security group config. |
Lets turn on the feature now access the Dynamics BC admin page and run though the steps
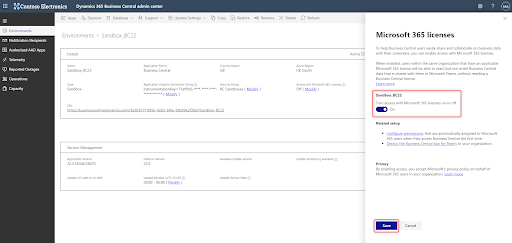 |
| Turn on the features in the admin portal |
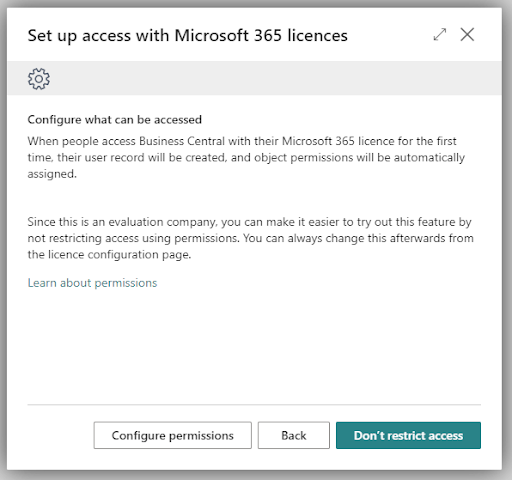 |
| We already prepared the permissions so its fine to choose "Don't restrict access" |
That's it - lets test it out now. For an M365 user to view BC records they need to be shared to Teams; here I have shared the Purchase Order list and pinned it as a tab
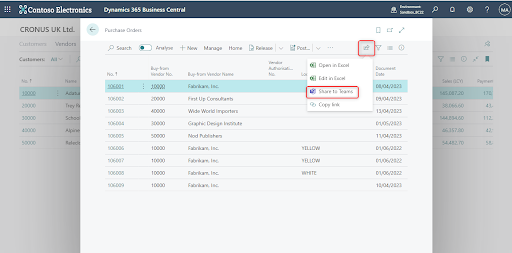 |
A BC user sharing a list page to teams
|
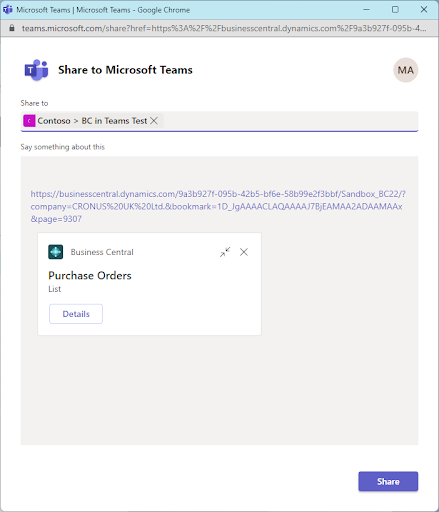 |
| Pick the team channel to share to |
Now, I've logged into Teams web as Grady, my example user who has an M365 license and no BC License
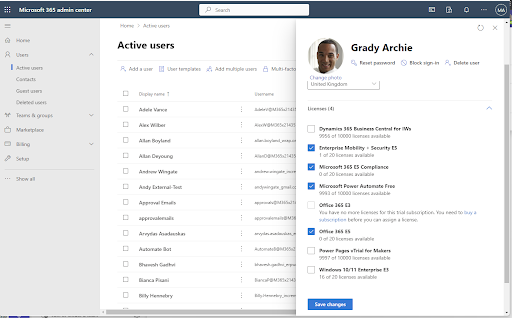 |
| Just to check what licenses Grady has |
Here is the Teams channel the BC user shared the PO list to
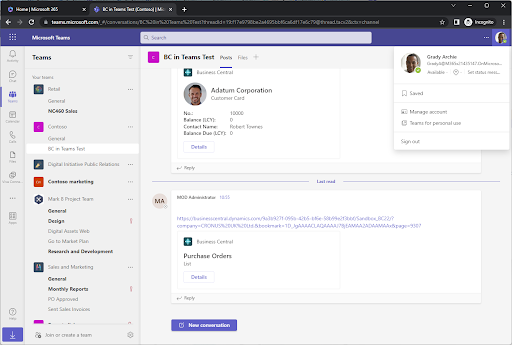 |
| Teams channel with content shared from BC by BC users |
Grady can view the list by clicking on the "Details" action and optionally pin as a tab for handy future access to all POs
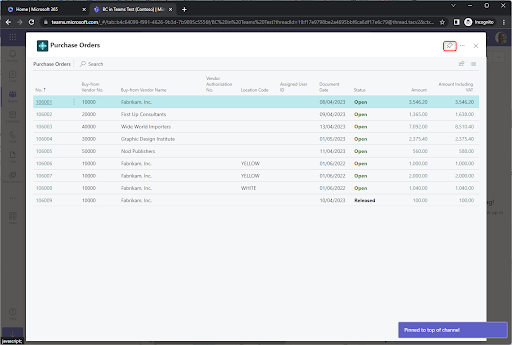 |
| The PO list page opened in Teams by Grady, our M365 user |
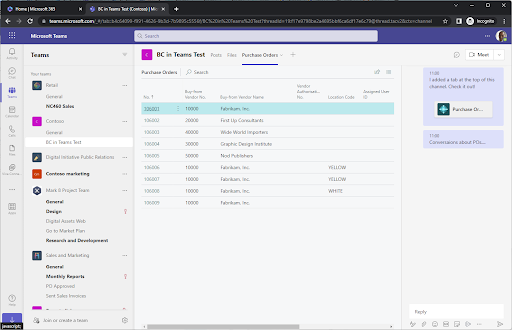 |
| Grady is now using the tab and tab chat to collaborate on these records |
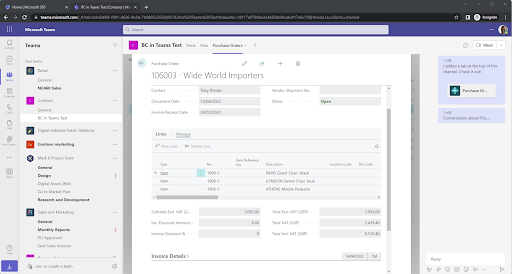 |
| Individual documents can be viewed from the list |
There we go 'free' access to BC for your M365 users!
The final bit of setup you may want to consider is the layout of the document presented in Teams, unlike a BC user accessing a page in the BC web client, M365 users accessing BC in Teams have no control of the layout.
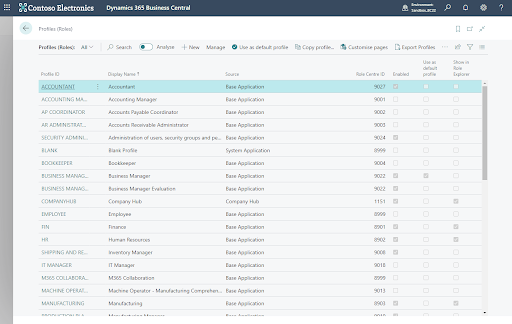
To manage this a BC admin should be mindful of the default profile in BC as that will be assigned to the M365 users when they access a BC object for the first time:
 |
| caption |
Then use the Customise Pages to set any layout for this profile, in this example the Vendor Order number was a handy which I've added:
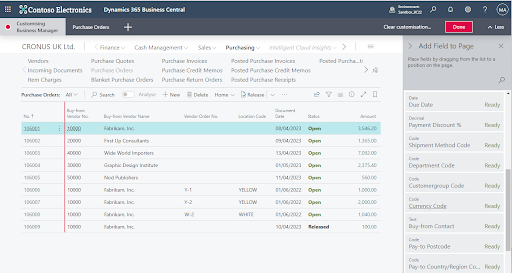 |
Customise pages, navigate to the page, and drag/drop field you want
|
Back in Teams - since Grady has been assigned that Business Manager profile - that's the view he will get.
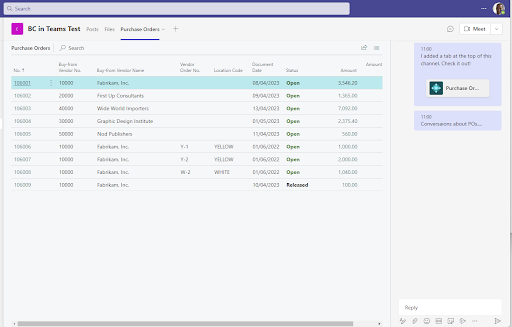 |
| Back in teams as Grady, to see the updated layout |
Summary
I have shown the steps to grand access to your M365 users, we ran through an example of an M365 user and we finally tailored the view that the M365 user got in Teams through the Profiles (Roles) > Customise pages features.


